Having a sophisticated stereo system in a boat is good for listening to music in a casual gathering or if someone does not like loud music. However, if a person wants to enhance the listening experience;
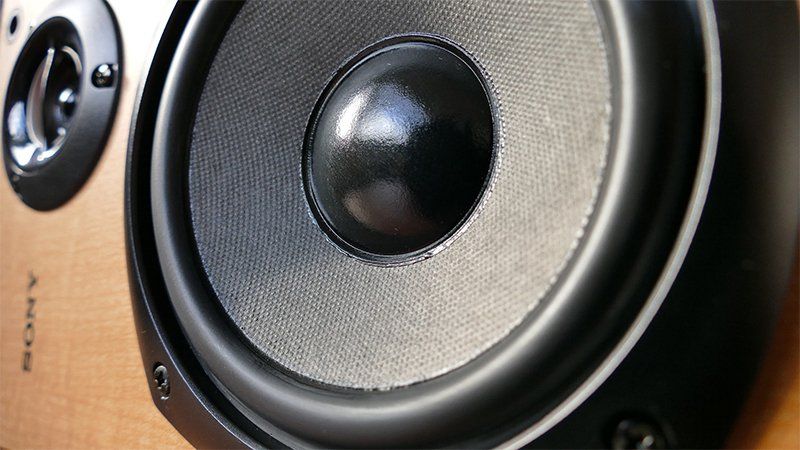
Jl audio marine subwoofer is the best option.
But, if someone doesn’t know how to install a
Jl marine subwoofer, he/she can end up ruining everyone’s marine party. No need to be worried as a comprehensive installation guide is here to help every music enthusiast.
How To Install A Subwoofer?
Install a subwoofer by following these steps. Get a wiring kit with everything needed for installation then choose a well-ventilated spot, mount the subwoofer, and then wire the boat subwoofers. Furthermore, test the subwoofer and clean the wire.
How To Wire A Subwoofer?
One can wire a subwoofer by following these steps. To wire in a parallel fashion: just connect the +ve leads of subs to the amp's positive terminal. And then connect the -ve leads of subs to -ve terminals of the amp. To wire in a series fashion: just connect the positive leads of 1 subwoofer with +ve terminals of the amp and connect -ve leads of the other subwoofer to the negative terminal of the amp.
Steps to Install A Subwoofer Explained
Well, we have studied that how to
install a subwoofer and also wiring it but installing a marine subwoofer requires in-depth guidance though. As we get a lot of queries about installing several variations of Jl marine subwoofers, from Jl audio 8-inch marine subwoofer to Jl audio 12-inch marine subwoofer. Consequently, we decided to write a complete guide about how to install them in order to address the questions of our readers.
So, without wasting our time, let’s have a look at a complete guide for installing a marine powered subwoofer.
- Mounting
- Wiring
- Testing
- Cleaning
Mounting
Wiring
As we have marine powered subwoofer by Jl so we need to buy an amp kit for ground, power, and lead wires. Then we are ready to run the wires around the rest of the system and the boat. An amp makes wiring a boat super easy.
Testing
As the Jl marine subwoofers are connected, now is the time to test them. We can do it by just turning on our stereo and test both subs. Let’s see what things we need to check are
- Check whether both the speakers are connected & working properly
- Turn up the volume and bass and paly any music to check for any rattling noises
- Check the user manual for any mistakes
Cleaning
As we have installed the
best marine subwoofer properly and also, we have examined its performance, we can go for a clean-up. We can do it by following these steps such as
- Just hide & clean up all of the wirings using the zip ties
- Place the wires in a location that is unreachable for passenger’s feet or water
Tips to Install A Subwoofer
Just reading a guide to install a subwoofer in a boat is not enough if someone wants to install it like a pro. These tips will save us from the hassle and any other potential damages. Let’s have a look at the tips to
install a marine powered subwoofer
- Mount it for Complete Protection
- Protect it from Water
- Mounting for Best Sound
- Use Hardware that does not corrode
1. Mount it for Complete Protection
In order to install a subwoofer in a boat, we have two options such as
- The dashboard area
- Cabin on a Boat
Even if someone chooses any of the above-mentioned options, the basic rules to mount a subwoofer will remain the same.
Please keep in mind that most marine stereo systems are made to be mounted horizontally. However, many of the marine stereos might work vertically but it can cause serious damages to the CD and the head.
So, at the time of mounting the Jl audio marine subwoofer, we can change the location of the whole unit if it is at the place where it is not working horizontally.
2. Protect it from Water
Before installing a subwoofer, always examine the place at which the stereo unit is installed. If it is installed in a place where it is not away from the water then change its location. The subwoofers and stereo units are water and spray resistant but they are not submersible.
Covering the back of the unit after getting done with mounting is ideal but, do not forget to select such a location for mounting that provides access to its back; in case, removing a panel/ opening a compartment may be required. Please always remember the exact spot of the input port as it will be needed in the future.
3. Mounting for Best Sound
Mounting a subwoofer in a boat is quite different than mounting it in a home/car. One of the significant differences in the sound reflects in a home or a car but in a boat, it happens just in the cabin and not in the cockpit/deck.
So, it is very important for all of us to select the speakers that have a high wattage rating than the stereo to which they’re connected.
4. Use Hardware that does not corrode
It is always recommended to select stainless steel hardware mounting on a boat. Most of the hardware is made up of steel that rusts. Stainless steel hardware is rustproof but, if excessive contact with enough saltwater is not prevented, it may get rust.
Final Words!
Well, this was a comprehensive and step-by-step Jl audio marine subwoofer
installation guide. We have tried our best to explain every detail about installing subs to a boat. Do read this guide to install Jl audio marine subwoofer carefully and perform the installation procedure without any hassle.