How To Install A Wireless Phone-Charging Nest On Your Boat? (2023)
If you're a boating enthusiast, you know the importance of having the latest technology on board.
One of the latest gadgets many boat owners install is a wireless phone-charging nest.
Not only is it convenient to have a designated spot for your phone to charge while you're on the water, but it can also help keep your phone safe and secure.
Installing a wireless phone-charging nest on your boat may seem daunting, but it can be a straightforward and rewarding process with the right tools and instructions.
In this blog post, we'll guide you through installing a wireless phone-charging nest on your boat, from choosing the right location to connecting the power source, we'll cover everything you need to know to get started.
Even if you're new to boating, take advantage of the opportunity to relax and stay connected on your next voyage.
Tools needed:
To install a wireless phone-charging nest on your boat, you will need the following tools:
- Jigsaw
- Drill with drill bits
- Hole saw (same diameter as the template for the cutout)
- Screwdriver (Phillips's head)
- Silicone sealant (marine grade)
- Electrical tape
- Wire strippers
- Crimping tools and heat-shrink collars
- Voltage tester or multimeter
- Fuse (rated according to the input voltage and current)
- Switch or breaker to turn the Nest charger on or off
This installation must use marine-grade components to withstand the harsh marine environment.
You should also follow all safety precautions when working with electricity and ensure that all connections are waterproof and corrosion-resistant.
Let's get started!
Step I: Choosing a location:
Choosing the right location for your wireless phone charging nest on your boat is essential.
A poorly placed charger can be frustrating and pose a safety risk.
Here are some factors to consider when choosing a location for your charger:
- Accessibility:
Make sure your chosen location is accessible to everyone on the boat.
A central location is usually best, so everyone can use the charger without disturbing others.
- Protection from the elements:
The charger should be protected as much as possible.
Look for a location not exposed to direct sunlight, rain, or splashing water.
Remember that electricity and water do not mix well.
- Stability:
The charger must be in a stable location that won't be knocked over or damaged.
Since the boat is often in motion, consider how the waves and wind might affect the stability of the charger.
- Compatibility with your phone:
Some chargers work better with certain types of phones.
Check the specifications of your charger and phone to make sure they are compatible.
- Power source:
A wireless phone-charging nest requires a power source, so consider the location of your boat's power supply.
If the charger needs to be connected to an electrical outlet, ensure one is nearby.
Alternatively, consider a portable charger that runs on batteries.
Step II. Installing the charging element
A wireless charging element uses inductive charging to transfer energy from the charging nest to your phone.
This technology uses an electromagnetic field to transfer energy between objects without a physical connection.
The charging nest contains an inductive charging coil that generates this field, while your phone has a receiver coil that captures the energy and converts it into a charge.
- Install the charging element on the bottom of the pocket:
First, ensure the pocket is clean and debris-free.
Next, peel off the backing on the adhesive pad attached to the bottom of the charging element.
Place the charging element in the center, aligning with the cutout.
After that, just press down firmly to ensure a good bond.
- Attach the retaining ring for the element with screws:
Attach the retaining ring for the charging element.
This ring is designed to hold the charging element securely in place and keep it from moving around in the pocket.
Next, place the ring over the charging element, ensuring the screw holes align with the holes in the element.
Finally, secure the ring to the pocket with the provided screws.
- Screw the wired charging disc into the center of the retaining ring:
The final step in installing the charging element is to screw the wired charging disc into the center.
Said disc makes contact with your phone and provides charging power.
First, align the disc with the center of the charging element and press down firmly.
Then, use the provided screws to secure the disc to the retaining ring.
Step III: Installing the charging nest
- Dry-fit the plastic Nest pocket to ensure proper alignment:
Before installing the charging nest, it is crucial to do a dry-fit to ensure everything lines up correctly. First, place the nest into the cutout in the boat and check to see that it sits flush with the surface. Next, ensure that the charging element is correctly aligned with the cutout in the nest.
- Apply marine silicone sealant:
Apply marine silicone sealant generously around the perimeter of the mating surface of the flange:
Once you are satisfied with the dry fit, remove the nest from the cutout and apply a generous amount of marine silicone sealant around the perimeter of the mating surface of the flange.
This sealant will help to create a watertight seal between the nest and the boat's surface.
- Slide the Nest into the cutout:
Slide the nest into the cutout, careful not to damage the wire for the inductive charger.
Again, use caution and avoid pulling or twisting the wire excessively.
- Squeez marine silicone sealant into the four screw holes.
Squeeze a small amount of marine silicone sealant into each of the four screw holes.
This will help to prevent water from entering through the screw holes and causing damage to the charging nest or boat.
- Secure the flange to the surface with self-tapping Phillips screws:
Secure the flange to the surface using self-tapping Phillips screws.
Tighten the screws snugly, but do not overtighten them, as this can damage the flange or boat.
- Attach the faceplate to the flange:
Finally, attach the faceplate to the flange.
You can do this with screws or snap-on clips, depending on the design of the charging nest.
Be sure to follow the manufacturer's instructions for attaching the faceplate.
Step IV. Connecting to Power and Wiring
- Check the power requirements for the inductive charging disc:
Before connecting the charging nest to power, it's essential to check the power requirements of the inductive charging disc.
Ensuring that the input voltage and current are compatible with your boat's electrical system is vital.
Most charging nests require a 12-volt power supply, so ensure your boat's electrical system provides a 12-volt output.
Check the manufacturer's instructions for the recommended input.
- Use a fuse rated according to the input voltage and current:
It's crucial to use a fuse to protect the charging nest from power surges and prevent potential electrical hazards.
The fuse should be rated according to the input voltage and current of the charging nest.
Again, check the manufacturer's instructions for the recommended fuse rating.
- Make all connections waterproof and corrosion-resistant:
As you're working with electrical connections near water, making all connections waterproof and corrosion-resistant is essential.
Use crimp-on connectors with heat-shrink collars to ensure a tight and secure connection.
Heat-shrink collars are necessary to protect the link from water, moisture, and other corrosive elements that can cause electrical problems over time.
- Wire the charging nest to the onboard power:
Once you've ensured that the power supply and fuse are compatible with the charging nest, it's time to wire it to the boat's electrical system.
First, connect the positive and negative wires of the charging nest to the switch or breaker that allows you to turn the nest charger on or off.
The switch or breaker should be connected to the 12-volt power supply of the boat.
- Connect the positive wire to the switch or breaker:
The positive wire of the charging nest should be connected to the switch or breaker.
Strip the end of the wire and connect it to the terminal of the switch or breaker.
Secure the wire by tightening the terminal screw.
- Connect the negative wire to the switch or breaker:
The negative wire of the charging nest should be connected to the switch or breaker.
Strip the end of the wire and connect it to the terminal of the switch or breaker.
Laslty, don't forget to secure the wire by tightening the terminal screw.
- Test the connection:
Turn on the switch or breaker once you've connected the charging nest to the boat's electrical system.
Ensure that the charging nest receives power, and the phone is charging.
If there are any issues, double-check the wiring and connections.
- Cover the wiring:
Once you've tested the connection and confirmed that the charging nest is working correctly, cover it with a wire or conduit to protect it from potential damage and corrosion.
By following these steps, you can ensure that the wireless phone-charging nest is wired correctly and safely to your boat's electrical system.
Remember, if you feel uncomfortable installing it yourself, it's always a good idea to seek the help of a professional electrician or boat technician.
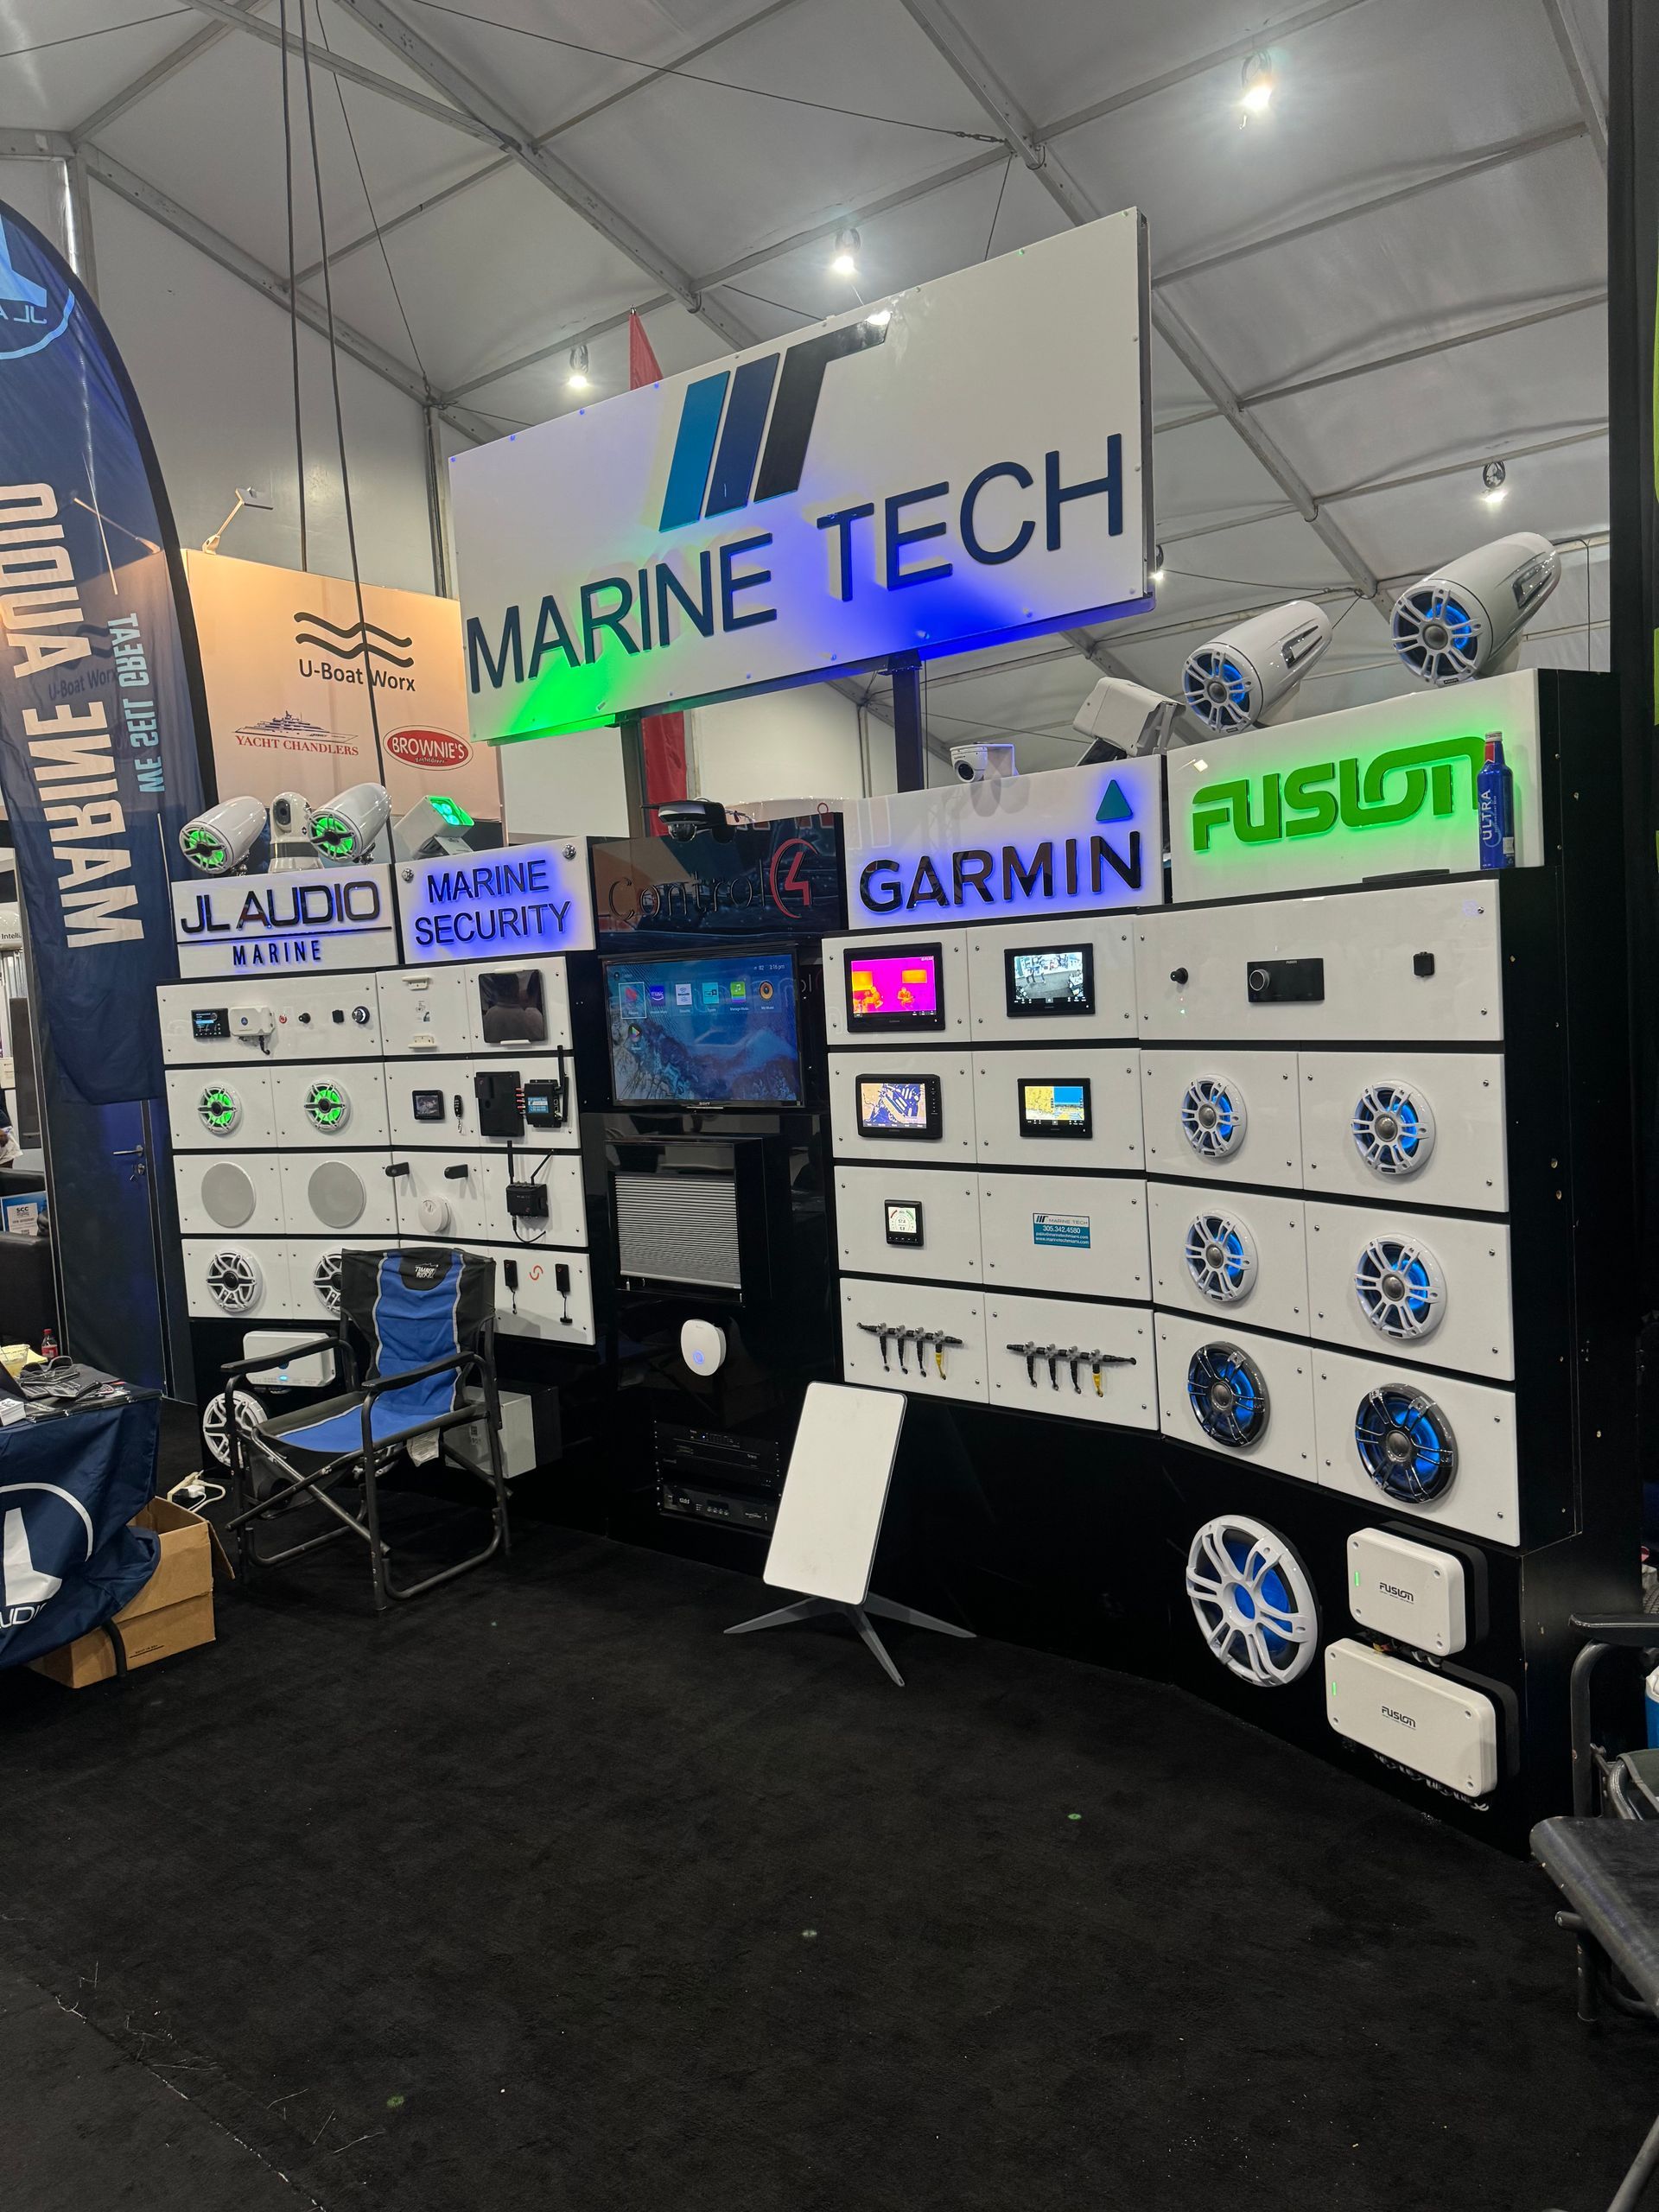
And that's where we can help!
With more than 25 years of experience, our team has worked with every type of boat, from personal watercraft to mega yachts.
The Marine Tech team has the experience, quality, and warranty that you and your boat deserve.
We specialize in all types of marine electronics installation, and we can help get started with any upgrade you're thinking of doing to your vessel.
Contact us today for a free estimate!
Contact Us
Contact Us
Recent Posts
CONTACT US
Looking to upgrade your marine electronics?
With more than 25 years of experience, we can help you get started today!